Tuesday 29 April 2014

Linus Torvalds on git in Google Tech Talk.

Linus Torvalds shares his thought on git in Google Tech talk.

Git is a free and open source distributed version control system designed to handle everything from small to very large projects with speed and efficiency. 

In this more than an hour talk, Linus talks about the git, the source control system he built himself. 


What's more funny to begin with: Some of you have probably heard of Linus Torvalds, those of you haven', you are the people with Macintoshes on your laps.

The video is quite a bit older, uploaded on YouTube on  May 14, 2007, but is still relevant.

Saturday 26 April 2014

Install GCC compiler collection in Linux

GCC, GNU Compiler Collection is a compiler system supporting various programming languages like C, C++, Objective-C, Fortran, Java, Ada and Go. GNU Compiler Collection is released under the GNU GPL license by the Free Software Foundation. Developed as the official compiler for GNU Operatin System, GCC has been adopted by most of the operating environments like Linux and BSD. Versions are also available for Windows and other operating systems.

If you have installed any Linux distribution on your system, chances are you already have GCC. In case, you do not have pre-installed gcc you can follow these steps.

Installing GNU Compiler Collection in Debian [Command Line]

Open Terminal and type the following command: 

$ sudo apt-get update
$ sudo apt-get install build-essential manpages-dev 

Find the version and the installation directory


$ whereis gcc
To check the directory in which gcc is present.

$ gcc --version
To check the version installed.

Graphical way to install [Debian User]

You can install gcc through the Add/Remove Software box. Navigate to System Tools > Add/Remove Software.


Search for gcc. Select the packages which you want to install (recommended for advance users who have all the knowledge about packages), else just select all the packages and install them.

Installing gcc in other Linux Distribution

If you are using Fedora, RedHat or CentOS, you can use the yum command to install gcc.

# yum groupinstall 'Development Tools'

If  are using Linux Mint, run these commands in the terminal.

sudo add-apt-repository ppa:ubuntu-toolchain-r/test
sudo apt-get update
sudo apt-get install g++-4.7 c++-4.7

Are you using any other Linux Distribution? Help our readers to install gcc on their Linux system by giving the terminal commands in the comments.

Note: It is most likely that your system already has gcc installed. Do check it first before manual installation.

Friday 25 April 2014

Add or Remove user accounts in Linux

user account logoLinux provides two ways to handle things, one as a normal user and other as a root user. Most people prefer to keep the root privileges to themselves and create a user account for everybody else. Root user has all the privileges to handle the system while any normal user has restricted access to many things.  In this article, I am going to tell you how to Add or Remove user accounts in Linux.

You can do it using either the command line or through the graphical way.

Adding a new user

$ sudo adduser <new_user_name>

This will first prompt you for your password, and then
- add a new user with name <new_user_name>
- add a new group with the same name as the user
- create a home directory (/home/<new_user_name>)
- add a few files to this directory (.bashrc, .bash_logout, .profile)
- asks for the password for the new account, twice
- asks for other information (full name, room number, phone numbers)

To add password to the new_user_name,

$ sudo passwd <new_user_name>

Changing the default shell for a user (say to /bin/sh)

$ sudo usermod -s /bin/sh <username>

Now, when the user gets a new terminal, it will open with the shell /bin/sh

Deleting a user

$ sudo deluser <username>

The user will be deleted, but his/her home will remain on the system

$ sudo addgroup <groupname>

will add a new group to the system

$ sudo adduser <username> <groupname> 

will add a user to a group

$ sudo deluser <username> <groupname>

will remove a user from a group

changing group and owner for a file

$ sudo chown <username> <filename>
$ sudo chgrp <groupname> <filename>

Note: Sudo command allows a normal user to run commands as a root user under Linux/Unix. 

Graphical Way: 

You can add or remove user accounts in Linux through the graphical way also.


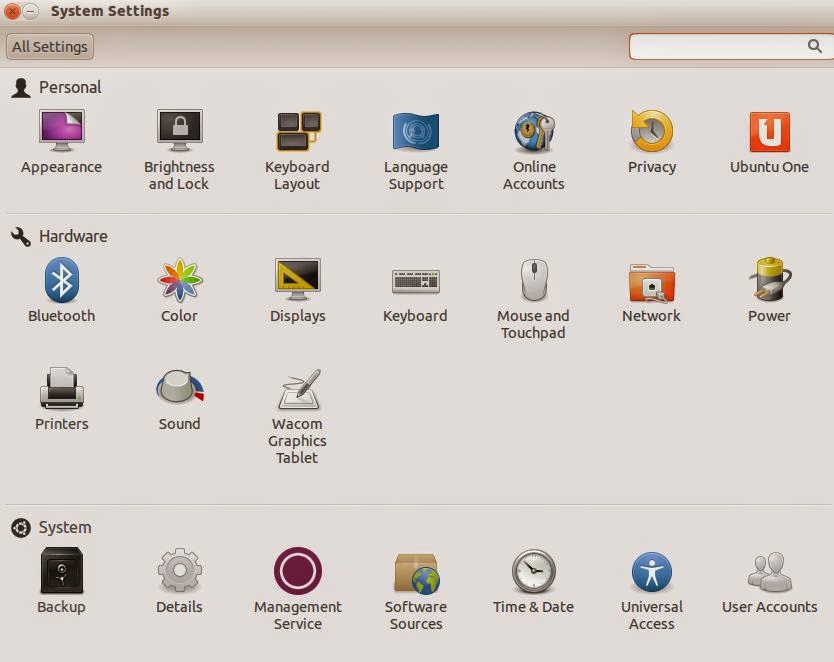
In Ubuntu, Open System Settings > User accounts. Now, you can add new user here, change password for your Ubuntu System etc.

You may also wanna read how to remove application in Linux Mint.

Top 12 Linus Torvalds quotes [something refreshing]

Linus Torvalds Quotes
Who don't know Linus Torvalds. He's the one who had written the first Linux kernel and is one of the major influences in the open source world.
If Microsoft ever does applications for Linux it means I've won.

In his long journey in the Open Source World which started in 1991 when he first wrote the Linux kernel, he has said million words and some has become so popular. In this article, I am compiling some the great, funny, and inspirational Linus Torvalds Quotes which you will love to read and share.

• Most good programmers do programming not because they expect to get paid or get adulation by the public, but because it is fun to program.

• If Microsoft ever does applications for Linux it means I've won.

• There are lots of Linux users who don't care how the kernel works, but only want to use it. That is a tribute to how good Linux is.

• When you say, "I wrote a program that crashed Windows," people just stare at you blankly and say, "Hey, I got those with the system, for free." 

• If you still don't like it, that's OK: that's why I'm boss. I simply know better than you do. 

• Most of the good programmers do programming not because they expect to get paid or get adulation by the public, but because it is fun to program.

• Software is like sex: it's better when it's free.

• Talk is cheap. Show me the code.

• Really, I'm not out to destroy Microsoft. That will just be a completely unintentional side effect. 

• I don't ask for money. I don't ask for sexual favors. I don't ask for access to the hardware you design and sell. I just ask for the thing I gave you: source code that I can use myself. 

• Nvidia, fuck you!

• The thing with technology is if you do something stupid you can fix it.


Thursday 24 April 2014

Removing Applications in Linux Mint

Removing Applications in Linux Mint is an easy process. In the process of using an operating system, you install packages / applications and when your job is done, you want to remove them to free up the resources they are handling.

In Linux Mint, removing an application is a click away. There are 3 different ways to remove an application in Linux Mint - Right Click method, using apt command and using the Synaptic manager.

Removing Application in Linux Mint.

Method 1: Using Right Click method.

This is the easiest method to remove an Application in Linux mint. Simply highlight the application which you want to un-install in the menu, right click on it and select "Uninstall".

The menu finds the packages related to the application you selected. Click on "remove" and you are done.


Method 2: Using Synaptic Manager.

Synaptic Manager is the graphical way to remove any application.

Open the Menu. Select "Package Manager". Search for the application you want to remove. Select mark for removal and click on apply.

Removing Applications in Linux Mint

Method 3: Using command line.

You can use the command line to remove any application using apt.

Open terminal from the menu and type the following command

apt remove <package-name>

Removing Applications in Linux Mint

In the above screenshot, since there is no opera installed on my system, so not removed. 
Note: You cannot use both Synaptic and apt command at the same time. Synaptic uses apt in the background so you cannot use both simultaneously.

Removing applications that you do not require anymore will free up your space and resources.

Wednesday 23 April 2014

Version numbers and codenames logic in Linux Mint

Linux Mint
 Linux Mint was started in 2006 and at present, is the forth most widely used Operating System after Windows, Mac and Ubuntu. There has been development ever since it started and different versions have been released. The one thing to notice to these version names is that there is a unique logic to each of it.

Codenames in Linux Mint are always a female name that ends with the alphabet "a". These Codenames follow an alphabetical order and the first letter of the codename corresponds to the index of the version number in the alphabet.

Since version 5, Linux Mint has followed a 6 month release cycle. The version number is increased by 1 every new release.

Here's a list of the versions that have released for Linux Mint and their codenames. You can clearly guess the version numbers and the codename logic associated.


Version       Codename

1.0              Ada
2.0              Barbara
2.1              Bea
2.2              Bianca
3.0              Cassandra
3.1              Celena
4.0              Daryna
5                 Elyssa
6                 Felicia
7                Gloria
8                 Helena
9                 Isadora
10              Julia
11               Katya
12               Lisa
13              Maya
14               Nadia
15              Olivia

When a minor update is rolled out, the codename starts with the same alphabet and ends with "a", as in the case of Barbara, Bea and Bianca. Similarly for the versions 3.0 and 3.1 releasing under the codename Cassandra and Celena.

Sunday 20 April 2014

Installing Debian on Oracle VM Virtual Box [Windows 7 Host]

Debian logo
I had installed Linux Ubuntu on Oracle VM Virtual Box and it is working fine. So, I thought of trying out another Linux Distribution and I chose Debian. Debian is one of the popular free operating system that is based on the Linux kernel or the FreeBSD kernel. Debian says, it will run on almost all personal computers including older systems.

Debian is a free and open source operating system that is free to use, modify and redistribute. It is one of the most popular Linux Distributions for Personal Computers and network servers. Debian is considered as a highly stable distribution.

Download Oracle VM Virtual Box

Before you will install Debian, you need to download a copy of Oracle VM Virtual Box. Install Oracle Virtual Box as any other software you install on your Windows system.

Download Debian

You can get a copy of Debian Distribution from its website. http://www.debian.org/distrib/. Try using a torrent link in order to reduce load on their servers.

Select i386 Debian for 32-bit and amd64 for a 64-bit Debian version.

Install Debian on Oracle VM Virtual box.

I assume that you have downloaded Virtual Box and installed it, and download the suitable Debian Image to install.

Step 1: Create a New Virtual Machine. 
 
Installing Debian on Oracle VM Virtual Box [Windows 7 Host]

Type a name by which you will identify this Machine. Select Linux as type and Debian (64 bit) version if you have download amd64 Debian. 

Important: There are two version for Debian available and if you select the wrong one, you will face problems while Installation. For me, i selected the 32-bit option and while Installation, a blank screen appeared instead of the Installation options. 

Click on next after filling out the details. 
 
Installing Debian on Oracle VM Virtual Box [Windows 7 Host]

In the next steps, you will be asked the various specs you want to give to your virtual machine like Memory size, storage size and whether you want to keep it Dynamic or Static. You just have to select your preferences and create the drive. 

Step 2: The next step is to mount the .iso file of Debian you have downloaded. 

Installing Debian on Oracle VM Virtual Box [Windows 7 Host]

Select the machine you have just created. Click on settings. Under the Storage tab, you will find a CD/DVD drive option. Select Choose a virtual CD/DVD disk file and navigate to the .iso file of Debian you hav downloaded. Click OK.

Step 3: Start the virtual machine. Debian boot screen will appear. Select Install, choose your language and proceed. With few clicks, Debian will be running on your Virtual Box. 

Note: Debian creates two different accounts. One is the root account and the other is the account that you will use. You need to provide the passwords for both of these accounts while Installation. 

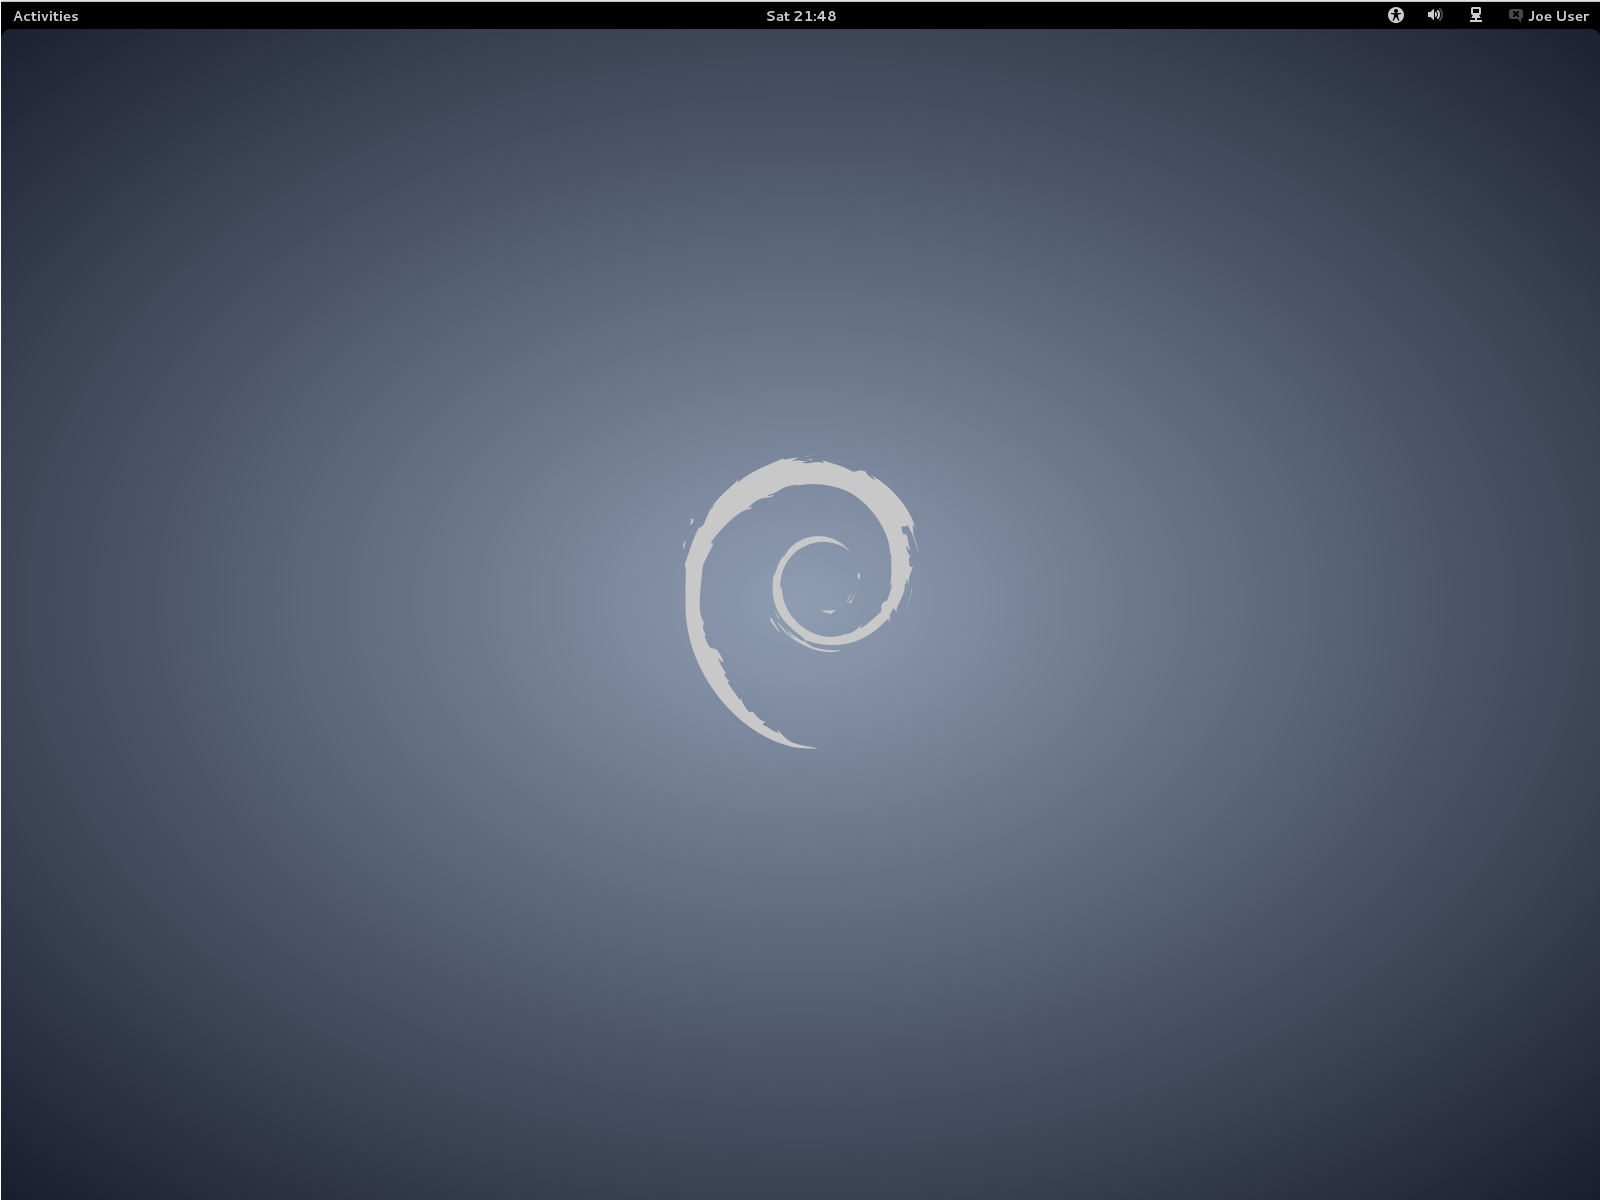
That's it. Debian comes with a default Gnome desktop environment.

If you face any problem while Installing Debian on Oracle VM Virtual Box with Windows 7 host, you can visit the Debian Support. You can even ask it in the comments here.

You can read more about Debian on Wikipedia.
Debian Homepage: http://www.debian.org

Thursday 17 April 2014

Ubuntu 14.04 LTS (Trusty Tahr) arriving today

Ubuntu 14.04 is the next Long Term Support Ubuntu version which means Ubuntu 14.04 LTS will be supported for 5 years for Ubuntu desktop and server, Ubuntu core, Kubuntu, Edubuntu, and Ubuntu Kylin. All other flavors will be supported for a time span of 3 years.

Ubuntu 14.04 LTS codenamed Trusty Tahr, is releasing today on April 17, 2014. The Beta versions were available for download but the stable version is releasing today. You can wait to see it when the download link for Ubuntu 14.04 appears on the Ubuntu download page.

Upgrading from Ubuntu 13.10 

Open Software Sources and press Alt + F2 to open the command box.

Type update-manager and open it. You will find the option New distribution release '14.04 LTS' is available.

Click upgrade and follow the steps to proceed.

What's new in Ubuntu 14.04 Trusty Tahr.

You can have a first look of Ubuntu 14.04 Trusty Tahr from PuppyLinuxWorld


A comparison of Ubuntu 14.04 LTS to the last Long term support release 12.04. 


You can read the press release Here.

Wednesday 16 April 2014

Top 3 Open Source Text Editors for Linux

There are numerous text editors available for Linux. Rating them is totally a personal choice. What one text editor suits to a person may not suit to other. In this article, I am going to discuss the top 3 Open Source text editors for Linux.

A text editor is a program with little or very less typesetting features. However, they are of greatly use for programmers and usually supports a large number of programming languages. 

1. GNU Emacs Text Editor


GNU Emacs is the most used and ported text editor and is licensed under GNU General Public License.

Platform supported: GNU, GNU/Linux, FreeBSD, NetBSD, OpenBSD, Mac OS X, MS Windows, Solaris

2. Vim Text Editor


Vim is a highly configurable text editor for efficient text editing. It is an open source and free software distributed under GNU GPL compatible license. It's an improved Vi editor written by Bram Moolenaar and was released in 1991. 

Platform Supported: Unix, MS Windows, Amiga, OS/2, Macintosh. 

3. Gedit Text Editor


gedit is a GNOME text editor which is powerful and is licensed under GNU General Public License. gedit supports a large number of mark up languages and a number of plugins are available for different purpose. It is the default text editor for Gnome desktop environment and is also available for Mac OS X and MS Windows.

Platform Supported: Linux, Mac OS X, MS Windows

What's your favorite text-editor and why do use it? Sharing your experience about the best text editor you prefer for yourself.

Tuesday 15 April 2014

How to Change Password in Ubuntu

If you are new to Ubuntu or have installed and using Ubuntu from a bootable drive or in a Virtual Machine and do not know how to change password for your Login, you are at the right place. In this article, I am going to show you how to change your password in Ubuntu.

There are two ways to change password in Ubuntu, either from Graphical Interface or through Command Line. Both the steps are simple and the command line way will work same in almost any Linux distribution. If you are using anything else than Ubuntu, you can still change your password through the command line method. The graphical way is different for different desktop environments.

Change Ubuntu Password from Command Line

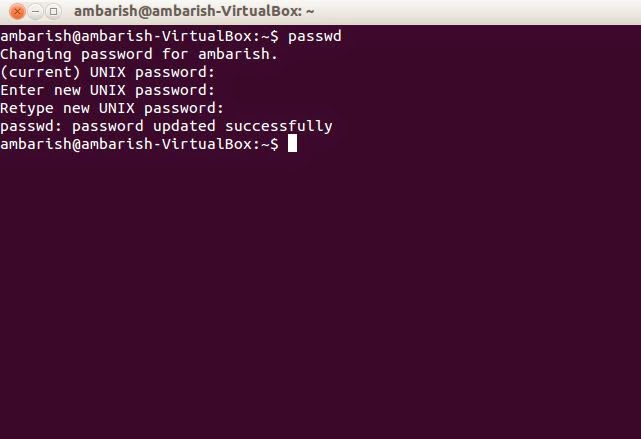
Open terminal and type 'passwd' and follow the instructions. When I tried to change the password for my Ubuntu on virtual machine, here's what I got in terminal. 

How to Change Password in Ubuntu

ambarish@ambarish-VirtualBox:~$ passwd
Changing password for ambarish.
(current) UNIX password:
Enter new UNIX password:
Retype new UNIX password:
passwd: password updated successfully

Change Ubuntu Password through Graphics interface

Open System Settings > User Accounts.

User account properties

You will see the Account Information and under the Login Information, you can change your password by clicking on it and updating your old password.


If you will update your password with an already used password, Ubuntu will not accept it and asks you to give another one. In case, your password for Ubuntu is too small or common, it won't accept in that case too.

Tip: It is always advisable to use a little complicated password by including digits, special characters, upper and lower case letters.

Monday 14 April 2014

Sunday 13 April 2014

3 Best Linux Desktop Environment for you.

Linux comes with choices. If your default desktop is not working for you, you can always switch to another desktop environment. There are various desktop environments that you can switch to, and in this article I am discussing the top 3 best Linux desktop environments along with their installation process.

If you are using Windows, you are given a default desktop which you can never replace. You can only somewhat change it a bit by dragging your Taskbar to another position, changing desktop icons etc, but the feel remains the same. In Linux, you are free to willingly change the complete desktop environments.

3 Best Linux Desktop Environments.

1. Unity


Unity is the default desktop environment for Ubuntu users. Unity includes a Dash from where you can search anything from apps to anything over web, File Manager, Firefox link, and much over. There are 4 different workspace you can switch in-between.

How to Install Unity desktop environment

Open the terminal and run the command

sudo apt-get install ubuntu-desktop

2. Gnome


Gnome was once the default Desktop environment for Ubuntu which is now replaced by Unity. However, it's still one of the primarily used desktop environments. Gnome team has done a great job in improving it and regain its position after Ubuntu's switch.

How to install Gnome desktop environment.

Open the terminal and run these commands 

sudo add-apt-repository ppa:gnome3-team/gnome3 
sudo apt-get update 
sudo apt-get install gnome-shell

3. Xfce


If you are using an older system and do not have that much resources to run a desktop environment like Gnome and Unity, you can switch to Xfce. It's a light weight desktop with lighweight file manager, text editor and image viewer. If you loved the traditional Gnome 2 desktop environment that do not have much complications and colors, you can switch to the smoother experience of Xfce.

I included Xfce in the list since it's still the best choice for low-end hardwares and it still has following of those who won't enjoy the glazing graphical effects and desktop environments.

To install Xfce desktop environments: 

sudo apt-get install xfce4

So, if you are not happy with your present desktop, choose the best desktop environment for you. The best part is you can always customize it to suit your need and preference.

Saturday 12 April 2014

How to Install VLC Media Player for Ubuntu

VLC Media Player is one the widest used free and open source media player among the Windows and Linux users. The biggest advantage is that it can play almost any kind of media file and the codecs are pre-installed. So, you do not need to download each codec separately. All you have to do is download VLC Media Player and install it to enjoy smoothing experience in watching movies and listening to songs. Being an open source and free software and licensed under GNU Genera Public License, you can use it, distribute it and share it with your friends without any cost. 

Features of VLC Media Player 
  • Simple, Powerful and Fast
  • Plays everything, Files, Discs (DVD, CD, VCD, Blu-Ray), Webcams and Streams
  • Plays most video formats with no codec packs needed: MPEG-2, H.264, DivX, MPEG-4, MKV, WebM, WMV
  • Works on most platforms: Windows, Linux, Mac OS X, Unix.
  • Completely Free and open source.
  • Media converter and streamer.

Install VLC Media Player for Ubuntu

There are 3 ways to install VLC Media Player for Ubuntu.

The first step is to install VLC Media Player for Ubuntu through Software Center. You can search the Software software and install it with a click.

The second step is to Install VLC the graphical way. 
  • Open Synaptic application. System > Administration > Synaptic Package Manager.
  • Search for vlc and install it. 
  • Also install browser-plugin-vlc.
The third way to install VLC Media Player is through Command line. 

Open a terminal and run the following two commands.

% sudo apt-get update
% sudo apt-get install vlc browser-plugin-vlc

These are the three steps through which you can install VLC for Ubuntu easily. VLC is a free and open source cross-platform multimedia player and framework that plays most multimedia files as well as DVD, Audio CD, VCD, and various streaming protocols. In case you have some damaged file or an incomplete downloaded file, you still can play it through VLC Media Player. Other meida players require you to download the complete file before it can be played. This feature of ubuntu gives you an option of checking the file quality while downloading. 

Image Courtesy : http://images1.videolan.org/vlc/screenshots/0.9.2/qt-fullscreen.jpg

VLC also supports playing subtitles along with the movie. The subtitle can be synchronized if it's not working in parallel to the audio and video. For more information about VLC Media Player, visit its homwpage www.videolan.org

If you want a complete list of the audio and video formats, input formats, subtitle and A/V formats, you can read it here. VLC Media Player Features.

There are various skins available for VLC Media Player and you can download it from the videolan skin download page.

To use these skins, Linux users have to follow the following steps: 
  • Put the downloaded VLT files in the following folder:~/.local/share/vlc/skins2
  • Open your VLC settings and change your interface from native to skins. 
  • Go to Interface>Choose Skin to select your preferred skin.
  • Restart VLC Media Player for the changes to work.
Additional Links:

Homepage : www.videolan.org

Friday 11 April 2014

Blank screen after entering password on Login - Ubuntu problem.


After Installing linux ubuntu on Oracle VM virtual box, the next big problem I faced was the blank screen after entering password on Login. Since the command line was properly working and the login screen too was displayed properly, I was sure there isn't any problem with the installation process. I Googled it and Ubuntu forum was flooded with the same question.

I found an appropriate answer to the question in one of the thread and got my problem fixed. The blank screen after entering password on Login was due to the fact that "Virtualization was disabled by default in my Windows 7". All I had to do is to enable the virtualisation. The same case might be with you.

Enable Virtualisation Technology.

I used to get a blank screen without any cursor and options/menu. 


It was frustrating. If the same case is with you, you can overcome the blank screen of Ubuntu in VM virtual box by enabling your CPU Virtualisation in the BIOS setting.

Follow these steps. 

Step 1: Restart your System and press "Escape" key on the start up to enter the Start Up Menu. (The key may vary depending on your system manufacturer).

Step 2: To enter BIOS Setup, press F10.

Step 3: Navigate to the System Configuration in BIOS setup menu. 

Step 4: You will find the "Virtualization Technology" disabled by default. Enable it, save and exit. 

Note: I am using HP Pavilion dv6 Notebook PC with 6GB RAM. The keys may be different for your make and model. Read your manual or search over web about it.

Now, you have done the work. All you have to do is restart your VM Ware and Login to Ubuntu with the username and password. The Blank Screen that appeared earlier after logging in has now been replaced with the Ubuntu Desktop. 

Not tried Ubuntu yet? Here's a way of trying ubuntu without installing.

Thursday 10 April 2014

'Heartbleed' bug - what you should know about it.

The 'Heartbleed' is security flaw in the OpenSSL which is widely used to encrypt web communication. The 'Heartbleed' allows anyone to get a copy of the server's memory where sensitive data is stored like username, passwords and even credit card numbers. It even provides security for applications like Email and Instant Messaging.

OpenSSL is an open source encryption standard toolkit implementing the SSL (Secure Socket Layer) and TLS (Transport Layer Security) and a full strength general purpose cryptography library. Most popular open source web server like Apache and nginx which having a combined of more than two-third of the market share uses OpenSSL. The sites running on these web servers are being affected. 

Heartbleed is the informal name for CVE-2014-0160. The bug is actually in the OpenSSL's implementation of the TLS heartbeat extension from where it derives its informal name. Heartbeat to Heartbleed - Ironic. Isn't it?

Heartbleed flaw allows anyone to get information from the server memory allowing them to fetch important and confidential data like Username, Passwords, Credit card numbers. Heartbleed even gives the attacker a possibility of securing the Private keys used to decrypt the encrypted messages. The attacker can then use this Private Key to read whatever is being done in the encrypted form. 

The leaked security allow attacker to decrypt any past and future messages and impersonate the service at will. This leak can be recovered by patching up the vulnerability and re-issuing, redistributing new keys and revoking the compromised keys. Recovery from the leaked Usernames and passwords requires the services to patch up the vulnerability and asking user to change their usernames and passwords and possible encryption keys. All session keys and cookies should be considered affected and must be destroyed. 

OpenSSL is the most popular open source cryptographic library and you are likely to be affected by it. The flaw has been there for two years and since it leaves no traces, you may assume your accounts be compromised. You should change your passwords to the services that uses your confidential information like credit card numbers. There is a need to remove this vulnerability. 

External Sources: 
Heartbleed bug: The website that has all the information about the bug.
Cnet.com: Some more technical details along with the effect of the Heartbleed vulnerability.
business insider: A guide to the Heartbleed bug.

Test your server for Heartbleed test at Filippo.io.
You can get a complete information about OpenSSL at their website www.openssl.org.

Wednesday 9 April 2014

Install Linux Ubuntu on Oracle VM Virtual Box

In my previous article Try Ubuntu without installing - Booting from USB / DVD I explained how to try out Ubuntu without replacing your existing Operating System from a USB Stick or DVD. In this article, I am going to tell you how to install Linux Ubuntu on Oracle VM Virtual Box so that you don't even need a USB or DVD to use it.

Before you can Install Ubuntu on Oracle Virtual VM Virtual Box, you need the VM software and .iso file of Ubuntu.

Download links: 


Steps to Install Linux Ubuntu on Virtual box.

I have assumed that you have downloaded both the files and installed Oracle Virtual Box on your system.

Step 1: Start Oracle Virtual Box. Click on "New". Give a name to the virtual environment you are creating. Select "Linux" as type and "Ubuntu" as version. Next.


Step 2: Assign the memory size. The recommended memory size is 512 mb. I would say assign something more than the recommended size for a hassle free experience. Next.


Step 3: Choose "Create a virtual drive now". Create.

Step 4: Keep on navigating "Next" until the virtual box is created. You will be asked the size of the hard drive for the virtual drive.


Step 5:You have successfully created a virtual drive. Initially, as you can see in the above figure, the virtual box is powered off. You need to select it and start.

Now, select start up disk. You can select the iso image of Ubuntu you have downloaded. Click on next will lead you to the installation process of Ubuntu. Install it under Virtual Box and enjoy ubuntu without loosing your current operating system.

Points to keep in mind while installing Ubuntu.

1. Choose the correct Ubuntu version.
2. Assign memory slightly more than the default value. It will give you a smoother experience.
3. If you have low end hardware, you might go for complete replacement of your current operating system with Ubuntu. Running Ubuntu will need resources.
4. Any more problems? You can always go to Ubuntu help forum. Perhaps there is already a solution present for your query. If not, post your question and people will help you.


Installing Ubuntu on a virtual box will work the same way as your current operating system. Ubuntu is un-doubtedly one of the best Linux distributions for people who needs everything on click. The graphical interface is beautiful and working with it is easy. Still using the same old Windows?

Switch to Open Source and try out Ubuntu. You will love it for sure.

Tuesday 8 April 2014

Try Ubuntu without installing - Booting from USB / DVD

Ubuntu logoDo not want to lose your Windows OS configuration and still want to try Linux Ubuntu? You can try Ubuntu without installing it on your hard drive through live DVD or through a USB stick say Pen Drive.

Ubuntu is the most widely used Linux distribution and if you are new to Linux, it is most probably the best distro for you. You will have to deal with very less command works and the Graphical User Interface is just perfect. 

But before you can use it, you need to download a copy of Ubuntu from its website Download Ubuntu here. After you download a .iso file, burn it on a DVD drive or on a USB stick.

Try Ubuntu without Installing - Booting from DVD

Step 1: Put the DVD into your DVD drive and restart your computer. You need to select CD-ROM drive as your booting preference.

In windows, restart your computer. Press F12 and you will enter the BIOS set up utility. The key may be different for different vendors and you can figure it out on your own.

Try Ubuntu without Installing - Booting from DVD

Select CD-ROM Drive as your booting option. Now as soon as you restart your system again, your system will boot with the live ubuntu DVD.

Step 2: The Install window appears on your screen. Choose your preferred language, You can either Install Ubuntu or Try Ubuntu.

Try Ubuntu without Installing - Booting from DVD


Try Ubuntu without Installing - Booting from USB

Step 1: You need to change your boot device order in order to boot from a usb device. The process is same as the step 1 of booting from DVD device.

After changing the boot device order, and preferring USB, your system will restart showing the Install Window on your screen. Select your language and try Ubuntu.

How to choose boot order

In most cases, you will able to do it by pressing F12 key or Escape key when your system starts and making changes in the Boot menu.

In case this do not work, watch out for the information displayed on the welcome screen when your system starts.

Even if you don't find any sign of opening Boot menu, try Google.

Important.

Most newer computers come with the facility to boot from a USB device. In case you are not finding USB device option in your boot menu, chances are that your machine do not support booting from usb device. You can then switch to Booting from DVD.

So, are you giving a try? Waiting to hear from you. 

Monday 7 April 2014

The Open Source Definition and distribution terms.

OSI - Open Source Initiative is a non-profitable organization founded in 1998 with the mission to increase awareness of Open Source software and to maintain the open source definitions. Open Source Initiatives promises better quality, reliability, flexibility, lower cost and an environment of improvement through source code availability.

Open Source Initiatives defines themselves in their own terms as:

The Open Source Initiative (OSI) is a non-profit corporation with global scope formed to educate about and advocate for the benefits of open source and to build bridges among different constituencies in the open source community.

Open Source Definitions

Open Source Initiatives has the following standard for Open Source Software.

1. Free Redistribution. The license shall not restrict any party from selling or giving away the software as a component of an aggregate software distribution containing programs from several different sources. The license shall not require a royalty or other fee for such sale.

2. Source Code. The program must include source code, and must allow distribution in source code as well as compiled form. Where some form of a product is not distributed with source code, there must be a well-publicized means of obtaining the source code for no more than a reasonable reproduction cost preferably, downloading via the Internet without charge. The source code must be the preferred form in which a programmer would modify the program. Deliberately obfuscated source code is not allowed. Intermediate forms such as the output of a preprocessor or translator are not allowed.

3. Derived Works. The license must allow modifications and derived works, and must allow them to be distributed under the same terms as the license of the original software.

4. Integrity of the Author's Source Code. The license may restrict source-code from being distributed in modified form only if the license allows the distribution of "patch files" with the source code for the purpose of modifying the program at build time. The license must explicitly permit distribution of software built from modified source code. The license may require derived works to carry a different name or version number from the original software.

5. No discrimination against against persons or groups. The license must not discriminate against any person or group of persons.

6. No discrimination against fields of endeavor. The license must not restrict anyone from making use of the program in a specific field of endeavor. For example, it may not restrict the program from being used in a business, or from being used for genetic research.

7. Distribution of license. The rights attached to the program must apply to all to whom the program is redistributed without the need for execution of an additional license by those parties.

8. License must not be specific against to a product. The rights attached to the program must not depend on the program's being part of a particular software distribution. If the program is extracted from that distribution and used or distributed within the terms of the program's license, all parties to whom the program is redistributed should have the same rights as those that are granted in conjunction with the original software distribution.

9. License must not restrict other software. The license must not place restrictions on other software that is distributed along with the licensed software. For example, the license must not insist that all other programs distributed on the same medium must be open-source software.

10. License must be technology-neutral. No provision of the license may be predicated on any individual technology or style of interface.

Source: OpenSource.Org 
The definitions are taken as it is from the Open Source Initiatives. There is a annotated definition available on the website with rationale. You can read it here Open Source Definition - annotated.