Showing posts with label Distribution. Show all posts

Wednesday, 27 December 2017

Amazon launches Amazon Linux 2

Amazon announced the release of Amazon Linux 2, a Linux server operating system from Amazon Web Services. Amazon promises to provide a modern application environment with the latest enhancements happening around in Linux community and offering a long term support with Amazon Linux 2.


Amazon Linux 2 is best suited for hosting web and desktop based applications, open source and proprietary database and more. It supports the latest Amazon Elastic Compute Cloud (Amazon EC2) instance features and includes packages which can easily be integrated with AWS.

Features of Amazon Linux 2


  • Amazon Linux 2 provides support to latest Amazon EC2 instance and includes packages that helps in easy integration with other AWS services. 
  • Amazon Linux 2 is offered as a virtual machine and container image and can be used for a test and production environment for developing and testing application. It provides full integration to AWS services.
  • Amazon Linux 2 comes with AWS CLI (Command Line Integration) and cloud-init, designed to simplify the scripting tasks.
  • Amazon Linux 2 is a long-term support release without any extra cost. It includes security updates and bug fixes for 5 years and also include the API compatibility for the same timeframe. 
  • It provides the Amazon Linux Extras repository which includes additional software packages like Python, Go, Rust, PostgreSQL, MariaDB and others. 
  • It includes systemd init system to manage system processes and better booting time along with better performance.
  • Amazon Linux 2 uses 4.9 LTS kernel and has been tuned to run efficiently in any virtualized environment including AWS. 
  • There are virtual machine images for KVM, VirtualBox, Hyper-V and VMware, in case you want to test an application on your personal system before pushing it to AWS. 


The virtual machine images can be downloaded from Amazon Linux Page

Amazon Linux 2 is not a general purpose yet-another Linux distribution. The main purpose here is to design an enhance Linux distro best suited for AWS platform.

The fact that it offers virtual machine images and is not just limited to its own platform gives the users a choice to design, develop and test their application on their local machine. The Amazon Linux Extra provides a fully supported environment for the latest version of  a wide variety of application.

It clearly looks as a competitor to Intel's Clear Linux, being platform specific and Amazon is trying to improve its Amazon Web Services platform by providing a native Linux OS with optimized performance and support to newer versions of different applications.

Monday, 8 May 2017

Installing Arch Linux in VirtualBox

Arch is another Linux distribution that is very popular in the Linux users. Arch is installed as a minimal base system without any desktop environment and the user has to do the most part to set things up. It has its own package management system called pacman and uses a rolling release which needs one time installation and further updates are pushed on it. Now since it's a minimal system installation, most of things are to be configured by the user himself. If you are planning to install Arch Linux in VirtualBox, you have to take care of various things.

In this article, we will see how to install Arch Linux in VirtualBox. The steps to install it along side Windows is same. 


Download Arch Linux 


You can grab a copy of Arch Linux from the official website : https://www.archlinux.org/download/.

Current release is 2017.05.01 running on Kernel 4.10.13. I have a two month old copy with me, version 2017.03.01 and to save some bandwidth, I will install this in VirtualBox. The process will be same for any version, though.

Setting up VirtualBox


I assume you have downloaded and install Oracle VM VirtualBox. Start the application and click on New to create a new Virtual Machine. Give your Virtual Machine a name and choose the Type and Version. Typing Arch Linux in the name will set the Type to Linux and Version to Arch Linux 64-bit. Also, it will set the Memory Size to 1 GB. You can increase it if you have a good amount of RAM. Leave the hard disk option to Create a virtual hard disk now.


In the next screen, assign the size of the Virtual Disk you are creating for the Arch Linux. Leave all the options to their default value.


Installing Arch Linux in VirtualBox


After setting up the Virtual Machine, the next step is to install Arch Linux. Start the machine you have created and a dialogue box will appear asking you to select the virtual optical disk file or a physical optical drive to start your new virtual machine.


Click on the folder icon and navigate to ISO file which you have downloaded. Click on Start to start boot into Arch Linux.

The next screen is the boot screen. Select Boot Arch Linux option and after various checks and service start up, Arch Linux will boot up but in command line.


Partitioning your disk


The next step will be partitioning the drive that you have allocated. I will be selecting 10GB for root, 4 GB for SWAP and the remaining for home storage for home partition. I will use fdisk command for partition.

Type lsbl to check the disk name which we have created. It should be sda.


Enter the below command for partitioning.

fdisk /dev/sda


For Command (m for help):, type n, then p for primary partition, 1 as the default partition no., enter to select the default first sector, and +10G for assigning 10GB for root.

Repeat the same process for swap. For the third partition which is gonna be the home partition, do not enter the size but press enter. It will accept the default last sector.

To view the partitions you have just created, you can press p.


Enter w commands to write all these entries permanently. These won't be written unless you issue the w command.

Creating filesystems 


Next step is to create filesystem and format the partitions we have just created.

We will use mkfs to create the file system and mkswap command to create the swap space.

Type in the following commands for the above work:

mkfs.ext4 /dev/sda1
mkfs.ext4 /dev/sda3

for swap:

mkswap /dev/sda2
swapon /dev/sda2

You can check the partitioned disks by command lsblk.


The next step is to mount the filesystem we have created. Type in the following commands to mount.

mount /dev/sda1 /mnt
mkdir /mnt/home
mount /dev/sda3 /mnt/home

Installing the Base 


pacstrap command is used to initiate the base installation.

pacstrap /mnt base base-devel

This will download the necessary package and installs them.

The installation will take some minutes depending upon your internet speed.

The next step is to create a mount table. Type in the following command.

mount /dev/sda1 /mnt
genfstab /mnt>> /mnt/etc/fstab

Mount table makes sure which filesystesm are mounted while boot up.


The next step is to configure the Base system.

Type in the following commands :

arch-chroot /mnt /bin/bash

This will change the system root to Arch Linux installation.

Configuring locale settings and time zone


locale settings are used for system language. Open file /etc/locale.gen and uncomment the language you want to use. I had to un-comment en_GB.UTF-8. To un-comment, remove the hash # sign from the line.

Now, run the following command :

locale-gen 
echo LANG=en_GB.UTF-8 > /etc/locale.conf
export LANG=en_GB.UTF-8

This will create locale.conf file at /etc location. Create another file manually

vi /etc/vconsole.conf and add the following line : KEYMAP=us

Now, to configure the timezone, you will need to check it first. Type in the following command to get the available zone

ls /usr/share/zoneinfo/


check the subzone

ls /usr/share/zoneinfo/


Once decided, set the timezone by typing the following command :

ln -s /usr/share/zoneinfo/Asia/Kolkata /etc/localtime

Next step is to set the hardware clock. time the following command :

hwclock --systohc --utc

Setting host names, root user, passwords 


We are on the verge of competing installation of Arch Linux in a VirtualBox.

To create a hostname, type in the following commands:

echo archLinux > /etc/hostname

I am putting archLinux as the hostname. Add this hostname to the hosts file too. Host files are present at /etc/hosts.

nano /etc/hosts

and add archLinux.


Now run the an update to your system

pacman -Syu

This will synchronize the database package.

Create a root password and installing bootloader.


Use the command passwd to create the root password for your Arch Linux Root account.

The final step is to install a bootloader. Type the following command :

pacman -S grub
grub-install /dev/sda
grub-mkconfig -o /boot/grub/grub.cfg

You are done with Arch Installation, before restart, exit the chroot environment, and unmount the filesystem.

Type these commands :


exit

umount /mnt/home
umount /mnt
reboot

At reboot, select Boot existing OS. Enter root as username and password which you have set in the above step to login.

Now, lets install a Desktop Environment.

Installing GNOME desktop environment in Arch Linux 


You will first need to configure the network.

Type ip link to get the interface name. My interface name is enp0s3. Type the below command now.

vi /etc/systemd/network/enp0s3.network 

and add the following info in the file.

[Match]
name=en*


[Network]

DHCP=yes

Save the file and exit. Type the following command to activate the changes:

systemctl restart systemd-networkd
systemctl enable systemd-networkd

Before we have network connectivity, edit the file /etc/resolv.conf and and 2 name server entries :

nameserver 8.8.8.8
nameserver 8.8.4.4

Now, you should have the network connectivity. You can ping google.com to check it.

Installing X environment


This will install a platform and necessary components to install a desktop environment. Type the following command :

pacman -S xorg xorg-server

This will install X Windows System. We are going to install GNOME desktop environment. Type the command :

pacman -S gnome gnome-extra

The next step is to install a display manager on Arch Linux and enable it so that a login screen is displayed on the start-up. GNOME includes the default display manager gdm but we have to enable it.

systemctl start gdm.service
systemctl enable gdm.service

That's it. Restart your virtual machine and boot into Arch Linux. Input the login credentials and you will be presented with Arch Linux with GNOME desktop environments. 


Let me know in the comments if you face any error. Arch Wiki is very well managed and chances are that you will find solution to any problem you face during the installation. Also, Arch Linux experience in virtual box is not up to the level when you install it as a primary OS. 

Wednesday, 2 November 2016

Installing Ubuntu 16.10 in Virtual Box

Before you install Ubuntu 16.10 in Virtual Box, you will need to Set up Virtual Machine for a Linux Distribution. Once done, head over to Ubuntu Download page and download the Ubuntu 16.10 ISO file. Once done, boot into the Virtual Machine using the ISO file as described in the above link. 


Once boot is done, you will be asked to either Try Ubuntu or Install Ubuntu. Since you are installing the latest release from Canonical, select Install Ubuntu to install in a virtual box.


The next window will be for Preparing to install Ubuntu. Select the first check box if you want to download the updates that have been rolled out after the 16.10 launch. It's always better to stay updated and I would recommend to go with it. However, you can update your Linux system anytime later too. So, if you are on a metered connection and need to wait for Wi-Fi, skip this part. The second option is for installing third party software which includes Graphics Drivers, Flash, MP3 Codecs and other media. I would recommend you to select this in any case. Ubuntu warns you about some of these third party software being proprietary. Click Continue once you are done with your selection.


The next dialogue box is for Installation Type. Since you are installing Ubuntu 16.04 in a Virtual Box, select Erase disk and install Ubuntu and proceed further. You can select the option to Encrypt the new Ubuntu installation directory to keep your data safe. Also, you can Logical Volume Management for easier partition later. 


In the next window, select your location. 


Select the keyboard layout in the next window.


In the next window, the installation will ask you to fill in the login credentials along with your Computer's name. You can choose to login automatically - do not go for it if you have a public system to keep your data safe.


Once done, click on Continue and the installation will begin. it will take some time depending upon the choices you have made to install updates / third party software. 


Once the installation complete, restart your system and login. That's it. 


Congratulations! You have successfully installed Ubuntu 16.10 in Virtual Box. Enjoy the Linux experience. If you are facing any difficulty in installing, let us know in the comments. Ubuntu 16.10 is not an LTS supported release and will be supported till July 2017 - 9 months from the release. Also, there are various options to try and test. Also, Ubuntu 16.10 will run better in Virtual Box. 

Saturday, 6 August 2016

Installing Fedora 24 in Virtual Box

Fedora 24 Desktop
Fedora 24 Desktop
This post is dedicated to Installing Fedora 24 in Virtual Box. Before you proceed with the installing of Fedora 24 in a Virtual Box, you first need to download and create a liveUSB or DVD and set up Virtual Machine for Linux

Once you are done with the pre-requisite steps, boot the Virtual Machine you have created and select "Start Fedora-Workstation-Live 24" from the list. 


The next screen will ask you if you want to just try the Fedora 24 or want to install it on your disk. You can use it for some day before installing it to find if it suits you and your work. 


Click on "Install to Hard Drive.". The installation instructions begins appear. Choose the language from the list. It was really great to see various Indian Language available for Fedora. No other distros provided such a large collection of regional languages. 


Once you are done, click on Continue. The next screen in Installing Fedora 24 in Virtual Box is User Settings. Click on root password and enter the root password. If you want to create a user, click on user creation, type in the username and password for the account. Also, you can give the Administrator privileges to the user you create by selecting a check box option. 


Once you are done, the next screen will be for selecting the Keyboard layout, Time zone, installation destination and network and hostname. Fill out the details, though all of it would already be detected and you only need it to change if you don't want the default. 


Click on Begin Installation to proceed with the installation of Fedora 24 in Virtual Box. It will take less than 10 min for the installation to complete. Once done, it will ask you to restart your computer. 

Enable Full Screen Mode

When I installed Fedora 24 and rebooted it, it was not the full screen mode and didn't cover the complete screen. To enable the full screen mode, you need to install the guest addition for Fedora. Open Virtual Box and in the Menu > Devices > Install Guest Additions CD image. Once done, you can reboot the machine and can Fedora will start in full screen mode. 

If you are facing any issues, this page have a detailed article on how to install it.

Wednesday, 6 July 2016

Cub Linux - best of Chromium with best of Ubuntu

Cub Linux
Cub Linux
I was trying to find a Chromium OS alternative since the one managed by hexxeh at has not been updated from long, and I came to know about Cub Linux. Trying for about a week, I find it very fast and smooth and the support for Ubuntu Applications just added to the comfort. In this article, I am writing about the features and installation process of Cub Linux. Since, it's not possible for me to try out all the Linux Distributions along with the primary OS, I have been running it in Virtual Box and the tutorial to install Cub Linux targets the Virtual Box. But, the process to install it as a primary OS is almost the same and you won't find much problem. 

Cub Linux is an open source Operating System that combines the speed, Google integration and web apps of Chromium Browser with thousands of applications of Ubuntu. Formerly knows as Chromixium OS, the Cub Linux gets it's name from Chromium and Ubuntu and tries to provide the best of Chromium open source project with the open Source Ubuntu OS. It tried to mimic the appearance of Chrome OS and is based on Ubuntu 14.04 LTS release. 

Cub Linux harnesses the power of Google ecosystem without being tied to the cloud. It comes with the Chromium browser which can be used to use apps from the Chrome store. The OS comes with a pre-installed Chromium browser, a YouTube client and a gmail app. 

Minimum system requirement for Cub Linux


  • 1 GHz Intel/AMD processor
  • 512 MB (1GB recommended)
  • 4GB storage (8GB recommended)
  • Video graphics capable of 800 x 600 resolution (1024 x 600 recommended)
  • Internet access

Download links

You can download the 32/64GB Cub Linux from the Download page of website, or you can click on the below link for the direct download.


How to install Cub Linux 

Once you are done with the downloading ISO image from the above mentioned link, set up the Virtual Box with 1GB RAM and 8GB of storage. Once you link the ISO with Virtual Box, start the machine. You will get an option to choose from Try Cub and Install Cub. Select Install and the language from the left menu.


The next screen is the preparing step where it will ask you for 6GB of free storage, plugging of your laptop to a power source and connection to the internet. If the internet connection is unavailable, you will not be able to download and install the updates and third party softwares.


In the next screen, Installation type, it will ask the different options. You can select to encrypt the new Cub installation for security and use of LVM with the new Cub installation. 

The next two screens will ask you for your timezone and language. Select your preference. The second last screen will ask the username / password with which you can use the Cub Linux OS.


Please ignore the "weak password" option, I was not interested in thinking something complicated for trying out something in Virtual Box :) 

You are done with all the settings and once you will click Continue, the installation will proceed. It took me around half an hour for the installation to complete. I had to restart my PC once the installation of Cub Linux completed.

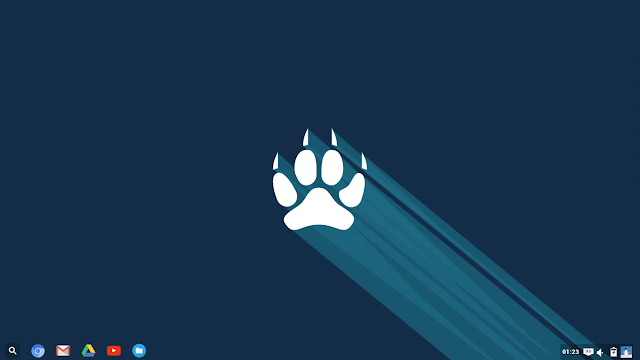
Here's what I got as the homescreen when I signed in with the credentials after the restart.


In the taskbar, you can find the Chromium browser, Gmail Client, Google Drive and YouTube icons. The overall User Experience was fast and smooth and the Cub OS worked so well that I am thinking of continuing with it for some more days. Who knows, it might end up on my other laptop as a primary OS. 

Just in case you have a spare desktop / laptop with very few resources, this Cub OS can be a perfect choice and you can give it a try.

Thursday, 2 June 2016

Ubuntu based BackBox Linux 4.6 released with Linux Kernel 4.2

The BackBox team has released the last of 4 minor releases, BackBox Linux 4.6 with Kernel 4.2 and other fixing some bugs along with updating base system and tools. 

BackBox Linux 4.6
BackBox Linux 4.6 Menu screenshot

Ubuntu based BackBox Linux distribution is maintained by Raffaele Forte who is the founder and main developer and is designed for penetration testing and security assessment providing a network and systems analysis toolkit. 

BackBox Linux includes some of the most commonly used security and analysis tool and is built on Ubuntu codebase. The main usage of BackBox Linux includes (but is not limited to) web application analysis, computer forensic analysis, automotive and exploitation. 

To install Linux BackBox, here's the system requirements :

  •     32-bit or 64-bit processor
  •     512 MB of system memory (RAM)
  •     10 GB of disk space for installation
  •     Graphics card capable of 800×600 resolution
  •     DVD-ROM drive or USB port (3 GB)


The BackBox 4.6 includes an updated Linux Kernel 4.2 , updated Ruby 2.2 and hacking tools updation like beef, dirsearch, metasploit, volatility, wpscan, openvas, setoolkit, yara etc. 

Termed to be most hacker friendly Linux distribution, it contains in-built softwares like WPScan for WordPress vulnerability scanner, exHexEditor disk editor for huge files, SE Toolkit for doing phishing attacks, YARA pattern matching swiss knife for malware researchers and others. 

You can grab an ISO 32/64 bit of BackBox from the official website.

Also, if you are already using one of the releases of BlackBox Linux, follow these steps to upgrade to BackBox 4.6.

sudo apt-get update
sudo apt-get dist-upgrade
sudo apt-get install -f

Running on Xfce desktop, BackBox provides an alternative and highly customizable environment required for ethical hacking and security testing. It maintains it's own repository core called Launchpad, that is constantly updated to the latest stable version of the most known and used ethical hacking tools. 

Have you used BackBox? How's the experience!

Wednesday, 1 April 2015

How to install different desktop environments in CentOS

CentOS is one of the different Linux distributions derived from Red Hat Enterprise Linux RHEL. It is a free and open source computing platform built from the publicly available open source code by Red Hat and has gained popularity lately.

Just like any other Linux distributions, centOS too is fully customizable. You can customize it according to your need and preferences. There are different desktop environments available and in case one don't suits you, you can always switch to another.

In this article, we will see how to install different desktop environments in CentOS in case you have installed just the minimal command line version, or the dekstop environment you have installed/got, is not suiting your preferences.

How to Install different desktop envirnments in CentOS

  • Installing GNOME desktop environment in CentOS

You can install GNOME with the command:

# yum -y groups install "GNOME Desktop" 

 After installation, type

# startx

to start the GNOME desktop environments.
  • Installing KDE desktop environment in CentOS

# yum -y groups install "KDE Plasma Workspaces" 
# echo "exec startkde" >> ~/.xinitrc
# startx 
  • Installing Cinnamon desktop environment in CentOS

Before installing Cinnamon desktopn environment,you need to add EPEL repository.

# sudo yum install epel-release
 
and then Cinnamon desktop environment:

# yum --enablerepo=epel -y install cinnamon*
 
# echo "exec /usr/bin/cinnamon-session" >> ~/.xinitrc
# startx 
 
 
These 3 different desktop environments are the most popular and widely used among Linux users and there is a pretty good chance that one of these will suit you. In case, if you have any other desktop environments for your CentOS, do share with our readers how to install it. Screenshots you can mail me at mb.linux.world@gmail.com and I will add it here.

Friday, 9 May 2014

Is Firefox OS the next big thing?

Firefox OSSo here it comes, the free and open source operating system for mobile devices from Mozilla - Firefox OS. Built entirely on HTML5 and other web standards, Firefox ensures freedom from the restrictions of existing proprietary platforms. Firefox OS is a Linux-kernel based open source operating system for mobile devices using open standards such as HTML5, JavaScript and open web APIs. 

Firefox OS is brought to you by Mozilla, a global nonprofit organization that emphasizes principle over profit. Firefox believes in a Web that should be cared for, not a commodity to be sold. Firefox OS is created by Mozilla which created one of the best and most widely used Web Browser Firefox and most likely, you are reading this article through it.

Firefox OS is still in the initial stage and is available on ZTE Open, LG Fireweb or an Alcatel One Touch device. Currently Firefox OS is available in 14 countries across the globe:
 Features.

Adaptive App Search. Firefox provides an adaptive search feature which enables the user to get information on any subject right when the user needs it.

Firefox Marketplace. Marketplace is a source for the best apps for Firefox OS. The app center is growing and enthusiast all over the world - the same people who contributed in the development of Open Source software and distributions are constantly working to improve it.

Open Source browser. Firefox OS contains the free and open source web browser Mozilla Firefox - the fast, smart, safe way to connect to the web.

Integration with the social media. Any updates from Twitter and Facebook will be right there in your notification, anywhere.

Other features. Firefox OS provides built in style features for fun, creative shots. You can enjoy the FM Radio and it is loaded with navigation tool, includes directions, traffic and local transit information.

Is Firefox OS the next big thing. 

Will Firefox OS be able to resist the dominance of Android and iOS? Time will tell. Firefox OS is still in the initial stage and has lot to cope up. Android has a large following and with Nokia acquisition by Microsoft, Windows 7 is getting its market share too. Its upon the enthusiast and the manufacturers to adopt it and bring open-ness in the Mobile OS.

I am personally looking for an Firefox OS device in India. The day it will be released, I will have. Will you?

Sunday, 20 April 2014

Installing Debian on Oracle VM Virtual Box [Windows 7 Host]

Debian logo
I had installed Linux Ubuntu on Oracle VM Virtual Box and it is working fine. So, I thought of trying out another Linux Distribution and I chose Debian. Debian is one of the popular free operating system that is based on the Linux kernel or the FreeBSD kernel. Debian says, it will run on almost all personal computers including older systems.

Debian is a free and open source operating system that is free to use, modify and redistribute. It is one of the most popular Linux Distributions for Personal Computers and network servers. Debian is considered as a highly stable distribution.

Download Oracle VM Virtual Box

Before you will install Debian, you need to download a copy of Oracle VM Virtual Box. Install Oracle Virtual Box as any other software you install on your Windows system.

Download Debian

You can get a copy of Debian Distribution from its website. http://www.debian.org/distrib/. Try using a torrent link in order to reduce load on their servers.

Select i386 Debian for 32-bit and amd64 for a 64-bit Debian version.

Install Debian on Oracle VM Virtual box.

I assume that you have downloaded Virtual Box and installed it, and download the suitable Debian Image to install.

Step 1: Create a New Virtual Machine. 
 
Installing Debian on Oracle VM Virtual Box [Windows 7 Host]

Type a name by which you will identify this Machine. Select Linux as type and Debian (64 bit) version if you have download amd64 Debian. 

Important: There are two version for Debian available and if you select the wrong one, you will face problems while Installation. For me, i selected the 32-bit option and while Installation, a blank screen appeared instead of the Installation options. 

Click on next after filling out the details. 
 
Installing Debian on Oracle VM Virtual Box [Windows 7 Host]

In the next steps, you will be asked the various specs you want to give to your virtual machine like Memory size, storage size and whether you want to keep it Dynamic or Static. You just have to select your preferences and create the drive. 

Step 2: The next step is to mount the .iso file of Debian you have downloaded. 

Installing Debian on Oracle VM Virtual Box [Windows 7 Host]

Select the machine you have just created. Click on settings. Under the Storage tab, you will find a CD/DVD drive option. Select Choose a virtual CD/DVD disk file and navigate to the .iso file of Debian you hav downloaded. Click OK.

Step 3: Start the virtual machine. Debian boot screen will appear. Select Install, choose your language and proceed. With few clicks, Debian will be running on your Virtual Box. 

Note: Debian creates two different accounts. One is the root account and the other is the account that you will use. You need to provide the passwords for both of these accounts while Installation. 

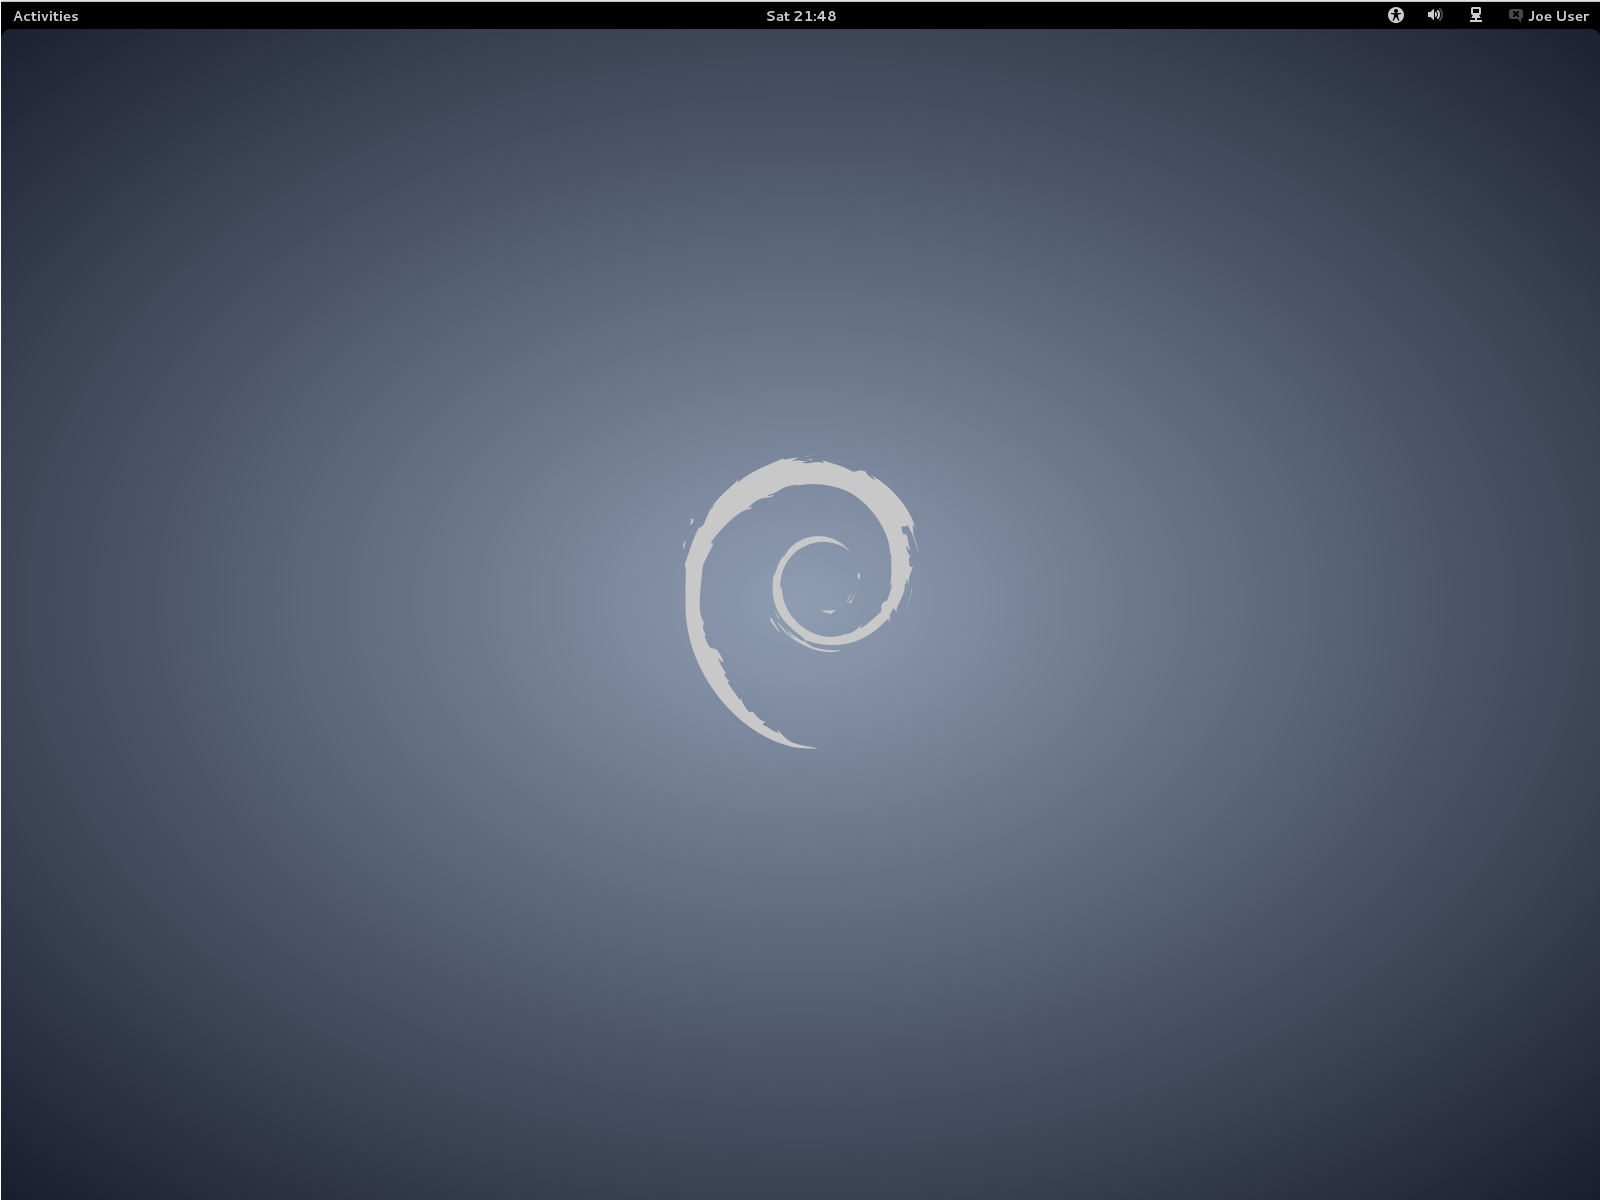
That's it. Debian comes with a default Gnome desktop environment.

If you face any problem while Installing Debian on Oracle VM Virtual Box with Windows 7 host, you can visit the Debian Support. You can even ask it in the comments here.

You can read more about Debian on Wikipedia.
Debian Homepage: http://www.debian.org

Thursday, 17 April 2014

Ubuntu 14.04 LTS (Trusty Tahr) arriving today

Ubuntu 14.04 is the next Long Term Support Ubuntu version which means Ubuntu 14.04 LTS will be supported for 5 years for Ubuntu desktop and server, Ubuntu core, Kubuntu, Edubuntu, and Ubuntu Kylin. All other flavors will be supported for a time span of 3 years.

Ubuntu 14.04 LTS codenamed Trusty Tahr, is releasing today on April 17, 2014. The Beta versions were available for download but the stable version is releasing today. You can wait to see it when the download link for Ubuntu 14.04 appears on the Ubuntu download page.

Upgrading from Ubuntu 13.10 

Open Software Sources and press Alt + F2 to open the command box.

Type update-manager and open it. You will find the option New distribution release '14.04 LTS' is available.

Click upgrade and follow the steps to proceed.

What's new in Ubuntu 14.04 Trusty Tahr.

You can have a first look of Ubuntu 14.04 Trusty Tahr from PuppyLinuxWorld


A comparison of Ubuntu 14.04 LTS to the last Long term support release 12.04. 


You can read the press release Here.

Sunday, 13 April 2014

3 Best Linux Desktop Environment for you.

Linux comes with choices. If your default desktop is not working for you, you can always switch to another desktop environment. There are various desktop environments that you can switch to, and in this article I am discussing the top 3 best Linux desktop environments along with their installation process.

If you are using Windows, you are given a default desktop which you can never replace. You can only somewhat change it a bit by dragging your Taskbar to another position, changing desktop icons etc, but the feel remains the same. In Linux, you are free to willingly change the complete desktop environments.

3 Best Linux Desktop Environments.

1. Unity


Unity is the default desktop environment for Ubuntu users. Unity includes a Dash from where you can search anything from apps to anything over web, File Manager, Firefox link, and much over. There are 4 different workspace you can switch in-between.

How to Install Unity desktop environment

Open the terminal and run the command

sudo apt-get install ubuntu-desktop

2. Gnome


Gnome was once the default Desktop environment for Ubuntu which is now replaced by Unity. However, it's still one of the primarily used desktop environments. Gnome team has done a great job in improving it and regain its position after Ubuntu's switch.

How to install Gnome desktop environment.

Open the terminal and run these commands 

sudo add-apt-repository ppa:gnome3-team/gnome3 
sudo apt-get update 
sudo apt-get install gnome-shell

3. Xfce


If you are using an older system and do not have that much resources to run a desktop environment like Gnome and Unity, you can switch to Xfce. It's a light weight desktop with lighweight file manager, text editor and image viewer. If you loved the traditional Gnome 2 desktop environment that do not have much complications and colors, you can switch to the smoother experience of Xfce.

I included Xfce in the list since it's still the best choice for low-end hardwares and it still has following of those who won't enjoy the glazing graphical effects and desktop environments.

To install Xfce desktop environments: 

sudo apt-get install xfce4

So, if you are not happy with your present desktop, choose the best desktop environment for you. The best part is you can always customize it to suit your need and preference.